If you’ve launched a WordPress site using a Bitnami stack—whether on AWS Lightsail, Google Cloud, Azure, DigitalOcean, or even a local virtual machine—you’ve probably noticed that small floating banner in the bottom-right corner.
It usually says “Powered by Bitnami” or simply “Manage” with a link to the Bitnami info page. Many call it the “Bitnami footer banner” because it sits persistently at the bottom of every page.
While the banner is harmless and helps Bitnami promote its excellent one-click solutions, most site owners and developers want it gone. It can make a professional client project look “stock,” distract visitors, or clash with your custom footer design. The good news? Removing it is quick, officially supported by Bitnami, and completely safe.
This guide walks you through methods to remove Bitnami footer banner, from the recommended server-side solution to quick workarounds and troubleshooting.
Why the Bitnami Banner Appears (And Why You Should Remove It)
Bitnami (now under Broadcom) provides pre-configured application stacks that include everything: WordPress core, Apache or Nginx, PHP, MySQL/MariaDB, security patches, and automatic updates. When you deploy “WordPress powered by Bitnami,” the stack automatically injects a small floating div for branding and quick access to server info.
Pros of keeping it: Instant link to useful docs and credentials. Cons: Looks unprofessional on live client sites, breaks the clean design, and some visitors click it expecting site navigation.
Removing the banner gives your WordPress site a polished, branded appearance without affecting functionality, performance, or support. Bitnami explicitly provides the removal tool in their documentation, so you’re not violating any terms.
Also Read: Top 5 WordPress Errors and Their Solutions
Prerequisites Before You Start
- SSH access to your server (root or sudo privileges).
- Basic comfort with the command line (copy-paste works fine).
- A backup of your site (always recommended, though banner removal is non-destructive).
- Know your stack: Most Bitnami WordPress uses Apache; a few use Nginx.
- Current date: February 2026 – the methods below are confirmed to work on the latest Bitnami stacks (docs last updated February 6, 2026).
Take 2 minutes to note your public IP and test that the banner is still visible by visiting your site in an incognito window.
Option 1: Remove the Bitnami Footer Banner Using SSH
This first method may not be friendly for absolute beginners, but considering you are on AWS, I assume you know how to use SSH login. You will just need to SSH into your machine and then execute the following command:
sudo /opt/bitnami/apps/wordpress/bnconfig --disable_banner 1sudo /opt/bitnami/ctlscript.sh restart apacheOption 2: Remove the Banner Without SSH Access
The easiest way to do this without getting into the backend is to edit the custom CSS. This method is even suitable for beginners who don’t know how to use Putty or how to use CSS. Just paste the given code, and you will be good to go.
Log in to WordPress admin → Appearance → Customize → Additional CSS.
#bitnami-banner{
display:none !important;
 }
Sometimes the following CSS will work
.bitnami-corner-image {
display: none !important;
}
Publish and clear any caching plugins (WP Rocket, LiteSpeed, etc.).
Pros: Instant, no server access needed.
Cons: Client-side only (visible in page source, can be seen by bots or users with CSS disabled). May reappear after theme or WordPress updates. Not ideal for production sites.
Option 3: Tweak bnconfig file
Again, this method is technical and requires knowledge ofan SSH client. However, it is the most relevant solution as well because using the CSS method, we just hid the icon from showing, but this method will actually disable the page, including the logo.
To disable the banner, open /opt/bitnami/apache2/conf/httpd.conf and comment on the line Include /opt/bitnami/apps/bitnami/banner/conf/banner.conf adding a # before it. (It may be on line 550 or above)
Then restart apache executing:
sudo /opt/bitnami/ctlscript.sh restart apacheBest Practices After Removal
- Add your own professional footer in Appearance → Customize → Footer (or via your theme).
- Consider a maintenance script that re-runs the bnconfig command after major updates.
- Document the change for future team members or when rebuilding the server.
- If you’re delivering to a client, show them before/after screenshots – they’ll appreciate the clean look.
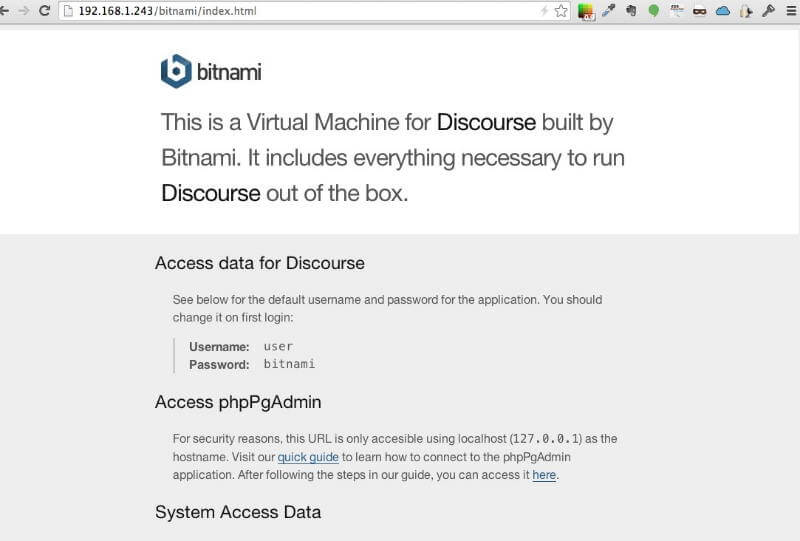
- Keep the /bitnami/index.html page available (password-protect it if paranoid) in case you need server credentials later.
You can safely remove the banner on production sites, staging sites, and even local development environments. Thousands of developers do this daily without issues.
Conclusion
Removing the Bitnami footer banner takes less than 60 seconds once you have SSH access and gives your WordPress site an instantly more professional appearance. Whether you use the official bnconfig method or the CSS workaround, your visitors will never know it was ever there.
If you run into any difficulties when deleting the banner, you should consult the Bitnami WordPress instructions or just leave a comment in the box below.