Do you want to create a website on WordPress but are not ready to show it to the world? Don’t worry, you can develop your WordPress website offline and migrate it to a live server when you are satisfied with the final design and functionalities.
Installing WordPress locally on your Windows machine allows you to experiment, test themes and plugins, and build your dream site in a safe, sandboxed environment.
In this article, we are going to teach you how to install WordPress in a local environment on your system and what tools to install.
Step 1 – Download Local Server Software
We’ll need local server software to set up a localhost environment and install WordPress on localhost. For this lesson, we’ll be utilising WAMP (for its ease of use). WAMP is a web server solution stack that runs on several platforms. WordPress requires a platform to run because it is built in PHP. This may be accomplished with WAMP. Depending on your operating system, you can utilise the development environment of your choosing.
WAMP is one of the few programmes that work on both Mac and Windows computers, which is why I suggest it. WAMP is far more user-friendly than any other local server environment.
Step 2 – Install the WAMP Server on your PC
To launch the installation, double-click the WAMP package file you downloaded (both come in a single package by default). On various successive popups, click “Continue” until the “Install” option appears.
After agreeing to their software licensing conditions, click “Install.”
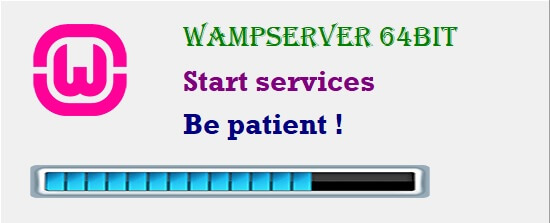
After you’ve successfully installed WAMP, open it and select “Start Servers” from the menu.
The system will transport you to a success page in your default browser after launching the servers, which will provide some information.
Step 3 – Create a Local Database
A database is required for your WordPress site to preserve data. To create the database you need to access phpMyAdmin in your browser. For that, you need to start the server. Just run WAMP like any other Windows program.
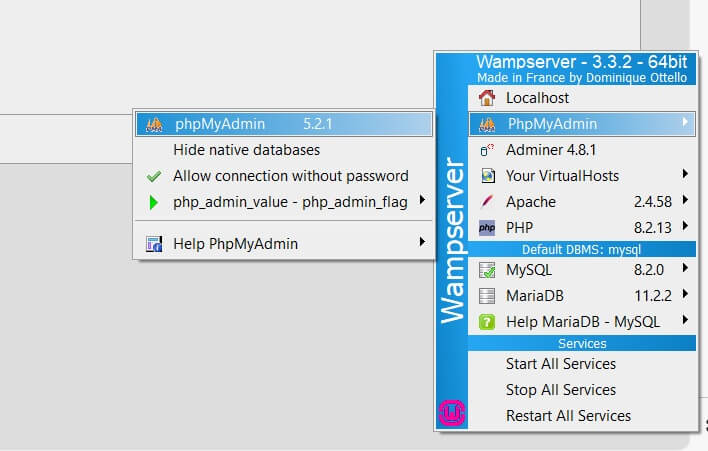
In your browser, go to localhost/phpmyadmin. You can also launch PHPMyAdmin from the notification area, as shown in the image below:
Click “New,” give it a name, and then “Create” to complete the procedure. Keep the “Database Name” in mind in case you need it again.
Step 4 – Download and Install WordPress on your Computer
You must first download WordPress from the official website to install it on localhost. Unzip the zip file you just downloaded.
Step 5 – Add all WordPress files to WAMP’s htdocs folder
At this stage, you need to place your WordPress files where the local server can read them.
Locate your WAMP installation directory. In most systems, it sits at:C:\wamp64\ or C:\wamp\
Inside this directory, you will find a folder named htdocs. This folder acts as the root directory for all local websites. Anything placed here becomes accessible through localhost in your browser.
Now follow these steps carefully:
- Open the folder where you extracted the WordPress ZIP file.
- You will see a folder named wordpress containing files like
wp-admin,wp-content, andwp-includes. - Copy this entire folder.
- Paste it inside the htdocs folder.
Step 6 – Install WordPress on the Localhost and Connect
Start by ensuring WAMP is running. The WAMP icon in the system tray should turn green, which indicates that Apache and MySQL services are active.
Next, open your web browser and enter the following URL:
http://localhost/your-folder-nameFor example:
http://localhost/mysiteOnce the page loads, WordPress will display its initial setup screen. Select your preferred language and click Continue.
This action launches the WordPress installation interface and prepares the system for configuration. At this point, the connection between your local server and WordPress is successfully established, and you are ready to proceed with entering the required setup details in the next step.
Also Read: How to Enable Missing ‘Localhost’ Prefix in WAMP
Step 7 – Give all required Information along with Admin details
To finish the WordPress installation on localhost, follow a few more steps. Click “Continue” after selecting a language.
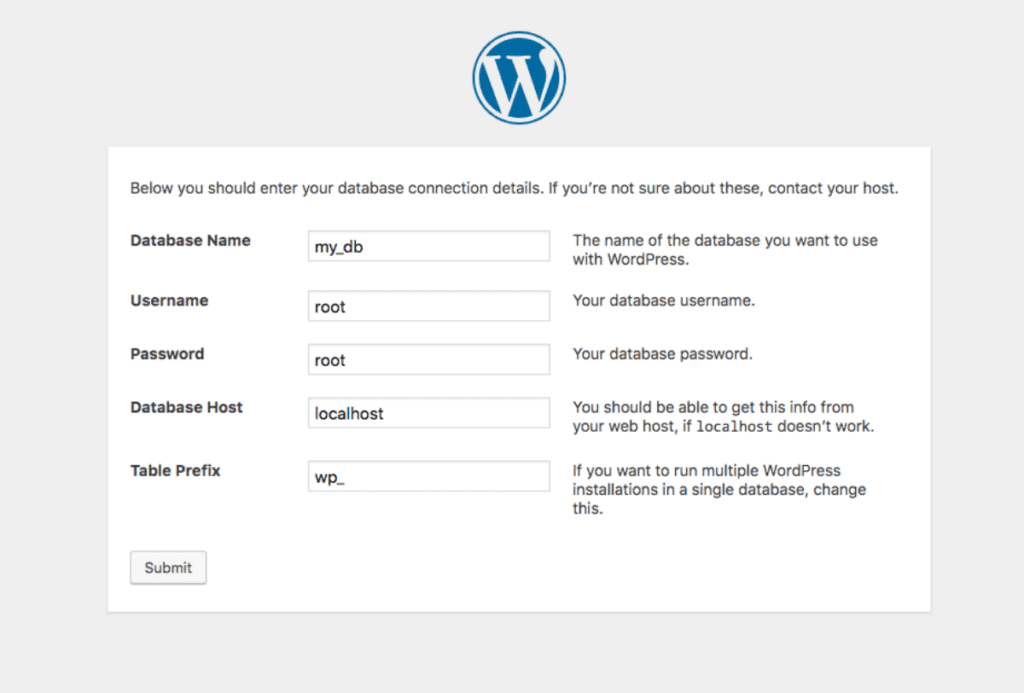
Click the “Let’s go!” button on the next page. “Database Name” (the database you established in Step 3) is required on this page. As stated on the WAMP installation success page, the username and password will both be “root.” On the following screen, click “Run the installation” after clicking “Submit” at the bottom.
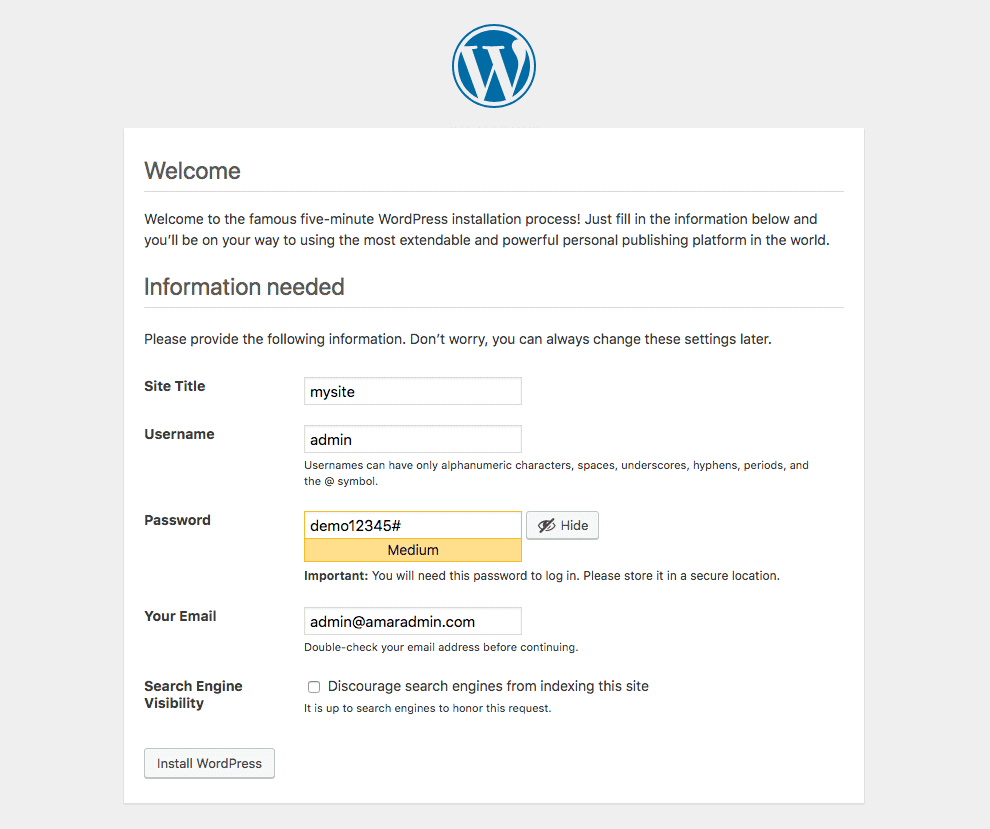
Create a title for your site and a username, password, and email address. Finally, at the bottom, click the “Install WordPress” option.
You’ve completed the installation of WordPress on your computer. Now is the time to log into your WordPress site, which is hosted locally.
If you’ve followed all of the procedures above, there’s no way you’ll run into any problems while installing WordPress on localhost. Now you can do whatever you want on your PC with your WordPress site. You may install WordPress on your VirtualBox machine using the same method. You may now test your website locally without risking any data.
Conclusion
That’s it. I hope you now understand how to install WordPress on your system using localhost and use it as a playground without any risk of losing important data or showing incomplete work to clients and website visitors.